


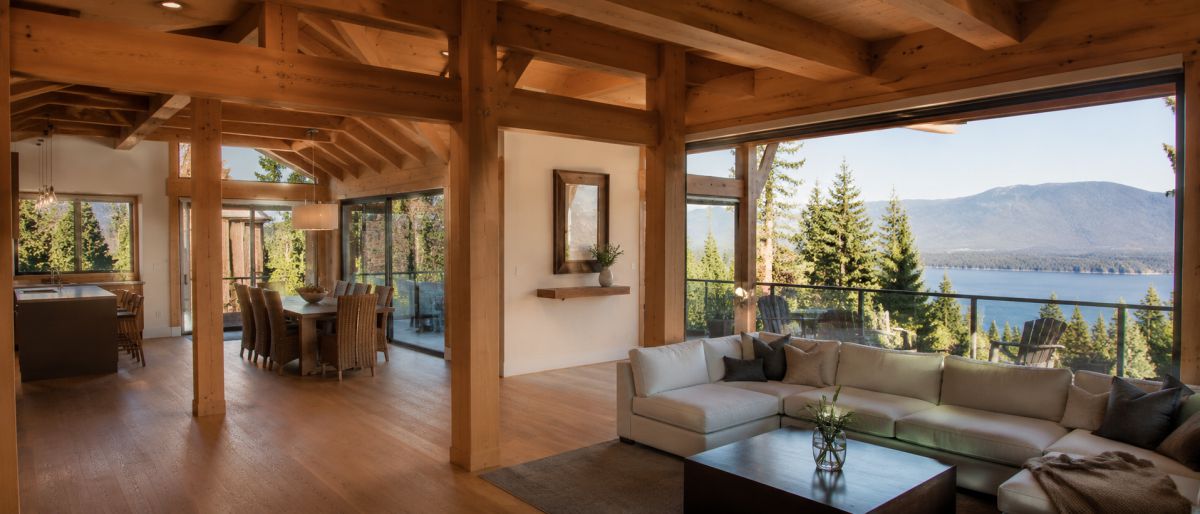
Post and beam homes are everywhere on the North Shore. Drive through Edgemont, Delbrook, Canyon Heights or the older parts of West Vancouver and you will see them constantly: low rooflines, exposed cedar beams, glass walls facing the view, and a carport instead of a garage.
Most were built between the mid 1950s and the late 1970s, when West Coast Modern architecture was doing something genuinely new with how a house could sit in a forest on a slope.
They are wonderful houses. They are also, from a renovation standpoint, nothing like the wood frame homes most contractors work on every day. The rules are different, and if you plan a post and beam renovation using assumptions from a conventional house, you will run into walls very quickly. Sometimes literally.
Here is what actually changes when the house is post and beam, and what to think about before you start.
What Post and Beam Construction Actually Means
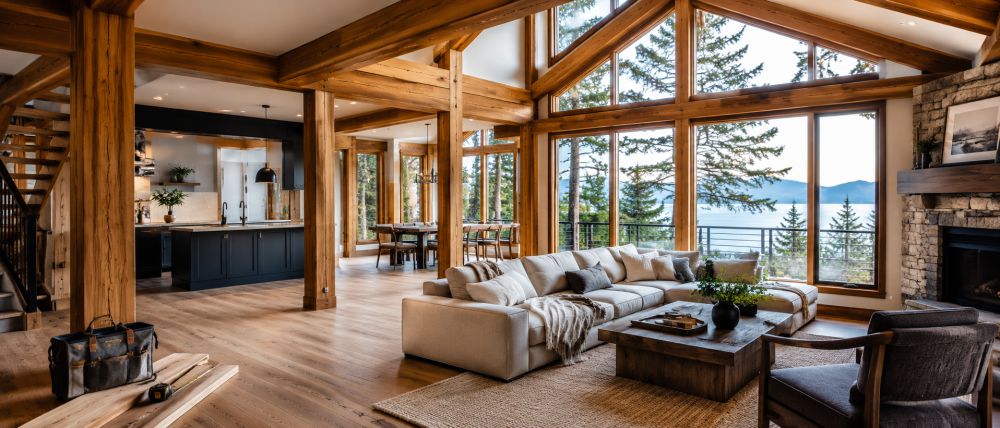
In a conventional wood frame house, the walls do the work. Studs every sixteen inches carry the load down to the foundation, and the walls, structure and enclosure are all the same thing.
Post and beam separates those jobs. A small number of large posts carry the weight to the foundation, big beams span between them, and the roof deck sits on the beams.
The walls are just infill. They divide space, hold insulation and keep the weather out, but structurally many of them are doing very little.
That distinction drives almost every decision in a renovation, and it cuts both ways. Some things that would be a major undertaking in a frame house are surprisingly simple here. Others that seem trivial turn out to be serious.
Why Removing a Wall Can Be Easier Than You Expect
In a typical 1970s frame house, opening up a kitchen means figuring out whether the wall is load bearing, and if it is, sizing a beam, installing temporary support, cutting in a header and adding posts down to the footing. It is a real structural project.
In a post and beam house, many interior walls are not carrying anything. The beam overhead is already doing that job. Removing a non structural partition can be closer to a demolition and finishing exercise than a structural one.
The important word there is many, not all. Some interior walls in these homes were added later, some were built as shear walls for lateral bracing, and some do pick up load where a span was too long.
You cannot tell by looking, and a wall that appears to be simple infill can be doing something you do not want to remove. A structural engineer sorting this out early is not an optional expense on these houses. It is the thing that tells you what your renovation actually is.
Why the Exposed Ceiling Is the Hardest Part
This is the single biggest thing that surprises homeowners, and it is worth understanding before you plan anything else.
In most houses there is a void above the ceiling. Wiring runs through it, ducts run through it, pot lights sit in it, and insulation fills it. It is unglamorous space that makes renovation easy.
A classic post and beam roof has none of that. The beams are exposed, the tongue and groove decking above them is both the structure and the finished ceiling, and immediately above the decking is the roofing. There is no cavity. There is nowhere to hide anything.
So the beautiful ceiling you want to keep is also the reason several ordinary renovation tasks become complicated:
- There is no space to run new wiring across the room
- There is no depth to recess pot lights into
- There is nowhere to route a duct for a range hood or bathroom fan
- There is often very little insulation, and no cavity to add more
None of this makes a renovation impossible. It means the sequence and the strategy have to be different, and it usually means decisions about the roof and the electrical need to be made together rather than separately.
How to Insulate Without Losing the Exposed Beams
A lot of these roofs were built with minimal insulation, sometimes just a couple of inches of rigid board above the decking, which was normal for the era and is not close to current expectations. On the North Shore, where the heating season is long and wet, that shows up as high energy bills and cold ceilings.
There are two ways to fix it, and they are very different projects.
Insulating above the roof deck
Rigid insulation goes on top of the existing decking, followed by new sheathing and new roofing. The advantage is that your exposed beams and wood ceiling stay exactly as they are, untouched, which is usually the whole reason you bought the house.
The trade off is that this only makes sense when the roof is due for replacement anyway, since you are reroofing regardless. It also raises the roofline slightly, which affects flashing details, fascia and how the roof meets walls and chimneys.
For most homeowners who want to keep the character of the house, this is the right answer, and the moment to do it is when the roof needs replacing.
Insulating below the roof deck
The alternative is to build down from the inside, adding framing, insulation and a new ceiling surface underneath. It avoids touching the roof, but it costs you ceiling height and it covers or partially buries the beams.
In a house with a low roofline, which describes most of them, this usually undermines exactly what makes the house worth keeping.
Occasionally it is the right call for a single room, especially a room that has been added or altered already. As a whole house strategy on a classic post and beam it is rarely satisfying.
Worth knowing: if your roof is more than twenty years old and you are planning a significant interior renovation, the insulation question and the roofing question should be answered at the same time. Doing the interior first and the roof three years later usually means paying twice for the same access.
Where the Wiring Goes When There Is No Ceiling Cavity
Electrical upgrades in these homes take planning. With no ceiling void, you cannot simply run a circuit across a room and drop it wherever you like, and many of these houses genuinely need electrical work.
Homes from this period often have original panels sized for a very different set of appliances, and 1950s and early 1960s construction sometimes still has knob and tube in parts of the house.
What tends to work instead:
- Routing new circuits through partition walls, which are usually the only cavities available
- Running along beam lines, in the corner where beam meets ceiling, where a small chase can be built and finished to look intentional
- Using surface mounted track or pendant lighting instead of recessed cans, which suits the architecture better anyway
- Bringing circuits up from below where there is a crawlspace or lower level
- Doing the electrical while the roof is open, if you are already reroofing for insulation
That last point matters more than it sounds. Coordinating the roof, the insulation and the electrical into a single phase is often the difference between an efficient project and three separate disruptive ones.
What to Do About Single Pane Floor to Ceiling Glass
The glass is the best thing about these houses and usually their weakest performing element. Original glazing is often single pane in aluminum frames with no thermal break, which means condensation running down the inside in winter, cold air pooling near the windows, and a lot of heat leaving the building.
Replacing it is worth doing, and there are two things to plan for.
First, the openings are frequently not standard sizes. These homes were built around the module of the structure, not around a window catalogue, so replacement units are often custom. That affects lead time more than anything else, and it is a common reason schedules slip when it was not planned for.
Second, modern insulated glass is considerably heavier than single pane, and the frames and supporting structure need to be assessed rather than assumed. This is usually straightforward, but it is a question to ask before ordering rather than after.
The design question is worth thinking about too. Part of what makes these houses work is the proportion of the glazing, the sight lines and how slim the frames are.
Modern units with heavy frames and thick mullions can quietly change the character of the room even when every other detail is preserved. It is worth looking at frame profiles carefully rather than choosing on performance numbers alone.
Renovating a Kitchen in an Open Plan House
Post and beam kitchens are usually open to the living space, which is a large part of the appeal and a real constraint on the renovation.
Everything you do in the kitchen is visible from the rest of the main floor. There is no door to close on a design decision that did not quite work. Cabinet height has to relate to the beam lines rather than fighting them, and upper cabinets that would be unremarkable in a closed kitchen can feel wrong against a low ceiling and a horizontal roofline.
Then there is ventilation, which is the practical problem. A range hood needs to exhaust somewhere, and with no ceiling cavity the options are more limited than usual.
Depending on the layout, that might mean venting through an exterior wall behind the range, relocating the cooking area during the redesign, or using a downdraft or island unit that ducts through the floor. Each has trade offs, and it is much easier to solve during layout planning than after the cabinets are ordered.
If you are working through a kitchen in one of these homes, our page on kitchen renovation in North Vancouver covers layout, cabinets and countertops in more detail.
Bathrooms, Ventilation and a Very Wet Climate
Bathrooms in these houses raise the same ducting problem in a smaller room where it matters more. A bathroom fan has to move air to the outside, and the usual route through an attic is not available.
This is not a detail to compromise on here. The North Shore is one of the wettest places in the country, and a bathroom that cannot clear humidity properly will find a way to cause problems, particularly in a house with wood ceilings and limited insulation. Getting ventilation right is more important in this climate than almost anywhere else in Canada.
Where the bathroom sits against an exterior wall the answer is usually straightforward. Interior bathrooms take more thought, sometimes routing through a partition or a soffit built deliberately as part of the design. Our page on bathroom renovation goes into waterproofing and ventilation in more depth.
Foundations, Slopes and Seismic Questions
Many of these homes were built into a slope, which was part of the point. The house steps down the hill, the main living level catches the view, and the structure sometimes sits on concrete piers rather than a continuous foundation.
A few things follow from that.
Access is harder. Getting materials to a house halfway up a hillside with a long driveway and limited staging space takes longer than a flat lot, and that affects scheduling more than most people anticipate.
Water moves downhill through soil and collects against uphill foundation walls. Drainage that was adequate in 1965 is often overwhelmed now, and a damp lower level in one of these homes is usually a drainage problem rather than a waterproofing problem.
Seismic standards have also changed substantially since these houses were built. Connections between posts, beams and foundations that were normal practice then are lighter than what is required today.
If your renovation is significant enough to involve structural work, it is a natural time to look at upgrading those connections, and an engineer can tell you what is worthwhile rather than what is theoretically possible.
Any excavation, underpinning or addition on a steep North Shore lot will also raise the question of a geotechnical report. That is a normal part of the process here, not a sign that something is wrong with your property.
How to Modernize Without Erasing the House
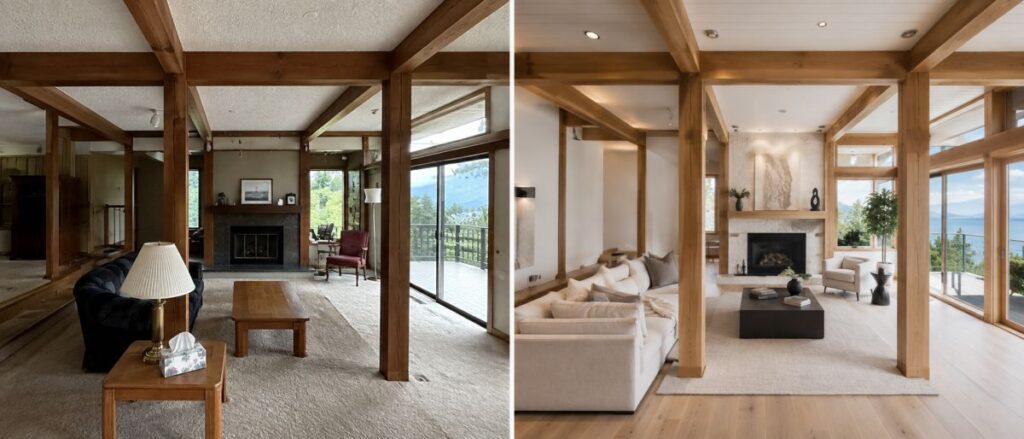
There is a version of this renovation that removes everything distinctive and leaves a house that could be anywhere. The beams get boxed in, the wood ceiling gets drywalled, the glass gets replaced with smaller punched windows, and what remains is an ordinary house that was expensive to create.
The better version is usually more restrained. Keep the beams and the wood ceiling. Keep the proportions of the glazing. Let the structure stay legible. Then bring everything else up to date: the mechanical systems, the insulation, the kitchen and bathrooms, the lighting.
West Coast Modern homes have become considerably more sought after over the last decade, and the ones that hold their value are the ones where the original design intent survived the renovation. That is not only a resale argument. These houses were carefully designed, and working with the architecture almost always produces a better result than working against it.
Planning a Renovation on One of These Homes
Post and beam homes reward planning and punish improvisation. The constraints are real but they are knowable, and almost all of them can be worked out before demolition starts rather than discovered during it.
The sequence that tends to work is straightforward. Have an engineer confirm what the structure is actually doing. Decide the insulation strategy early, because it determines whether the roof is part of the project.
Coordinate electrical with whatever roof work is happening. Order glazing early because of lead times. Then design the interior around the structure instead of pretending it is not there.
Caniversal works on homes across North Vancouver and West Vancouver, including a lot of houses from this era. If you are planning something on a post and beam home, our home renovation services page covers how we approach whole home projects, and you can see finished work on our recent projects.